Wilderness Navigation UK: Map, Compass & GPS (The Honest Skill Order)
This page contains affiliate links. As an Amazon Associate we earn from qualifying purchases — this does not affect the price you pay.
Picture this: you’re on a mist-clad ridge in the UK, the path’s vanished, and your phone’s just flashed ‘No signal’. That gut-punch moment? We’ve all been there. This guide isn’t about avoiding those moments; it’s about confidently navigating through them. You’ll learn a simple, resilient workflow: map, compass, and GPS as your safety net. No single tool is foolproof, but together, they make you independent of technology and, crucially, panic.
The “Red on Red” Rule: Why You Need a Hybrid System
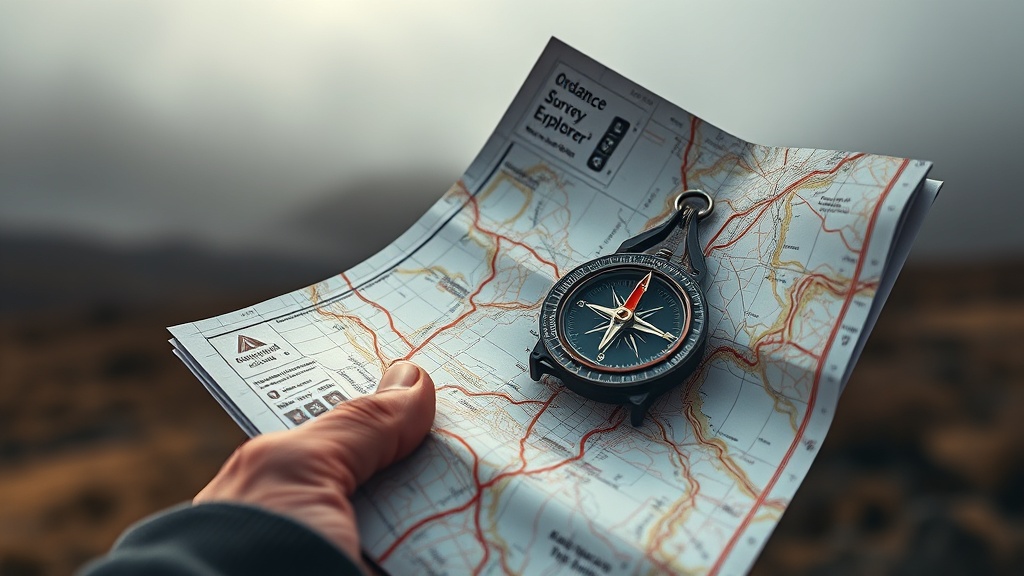
The core of any fail-safe navigation plan is the “Red on Red” rule – keep the red needle of your compass on the red grid lines of the map, and the two reds stay aligned. When they match, you know you’re pointing the right way.
Why bother with two tools? Batteries die, phones get wet, and the UK’s rolling hills are notorious for cutting out mobile coverage. A quick look at the Mountain Rescue England & Wales guidelines reminds us that the majority of call-outs stem from lost hikers who trusted a single device. Redundancy isn’t just prudent; it’s essential.
In the UK, especially on remote moors or the Scottish Highlands, you’ll often find yourself in valleys where satellite signals vanish. The “Red on Red” philosophy forces you to have a paper map and a compass as your baseline, with GPS acting only as a confirmation layer. It’s a belt-and-brace approach that strips away the false sense of security a phone can give.
The Foundation: Reading the UK Ordnance Survey Map
The orange grid and how it works
Ordnance Survey maps use bright orange grid squares that are 1 km on a side. Inside each orange square you’ll see finer black lines marking 100 m sub-squares. Those are the first thing you should locate on the map – they’re your primary navigation reference.
- Scale matters – The Explorer series (1:25 000) shows every footpath, wall, and stone wall. The Landranger series (1:50 000) gives you a broader overview but can hide minor tracks. For most wild-camping routes, the Explorer is worth the investment.
- Contours – The OS uses 10 m contour intervals in most of England and Wales, 5 m in the Lake District and Scottish mountains. Close-spaced lines mean a steep slope; wide spacing signals a gentle rise. Learning to read them lets you anticipate how tough a climb will be before you even start.
Building a mental map
Before you even unfold the map, picture the terrain in your head. One walker tried to “wing it” on the Pennines, assuming the ridge would be a straight line because the map looked simple. The ground, however, turned into a series of undulating cols that cost an extra hour of scrambling. Visualising the hills, valleys, and watercourses on the map first saves you from nasty surprises.
Mini-tutorial: finding a 6-figure grid reference
- Locate the two-letter grid square (e.g., NY).
- Find the eastings – the first three digits after the letters, read from the bottom left of the orange square.
- Find the northings – the next three digits, read from the left side.
So NY 123 456 points you to the centre of the 100 m square at eastings 123 km and northings 456 km. Plug that into your GPS (offline, of course) and you have a precise spot to check against.
For more on protecting your maps, see our guide to the Best Waterproof Map Cases.
The Compass: Taking a Bearing and Following It
Setting the map to the ground
First, lay the map flat on a stable surface – a rock or a pack lid. Rotate it until the north arrow on the map points to magnetic north (or true north if you’ve applied declination). The red grid lines should now line up with the real world, making the “Red on Red” rule possible.
Taking a bearing
- Spot a landmark you can see – a cairn, a church spire, or a distinctive rock.
- Place the compass base plate over the landmark, keeping the direction-of-travel arrow pointing at it.
- Rotate the compass housing until the red needle sits inside the orienting arrow (the little “red-on-red” alignment).
You now have a bearing that points from your current position to the landmark.
Following a bearing – the “Walk and Turn” technique
Staring at the needle the whole way is a recipe for disaster. Instead, walk a short distance (about 30 m), then stop, re-check the needle, and adjust. This “walk and turn” method keeps you aware of the terrain – you’ll notice if the ground suddenly drops into a ditch or if a wall blocks your line of sight.
Magnetic declination in the UK
The UK’s magnetic north sits a few degrees east of true north, varying from about 0° in the west to 5° E in the east. For most day hikes, you can ignore it if you’re just using “Red on Red”. If you need pinpoint accuracy – say, for a long-distance trek across the Cairngorms – add the declination value shown on the OS map’s legend to your bearing.
Pro tip: I swear by the Silva Expedition 4 (paid link). Its luminous needle stays visible in the gloom of a Scottish night, and the sighting mirror lets you take precise bearings without squinting. The only gripe? The base plate can feel a tad flimsy after a few knocks, but it’s still a solid, belt-and-brace companion.
For a full comparison of compass options, head to our Best Compasses for Hiking page.
The New School: GPS & Apps for the UK
Offline maps that actually work
OS Maps (the official Ordnance Survey app) lets you download entire map sheets for offline use – a lifesaver when you’re out of signal. Always pre-load the Explorer sheet for the area you’re tackling, then switch the app to “low-power” mode to stretch the battery.
Other solid choices include ViewRanger (now part of Outdooractive) and Cicerone. All let you plot waypoints and see your position relative to the orange grid, but remember: they’re confirmation tools, not primary navigation.
Battery management – the biggest enemy
A dead phone in the fells is a nightmare. My go-to routine:
- Charge the phone to 100 % the night before.
- Pack an approximately £30-£45 (roughly) power bank – a 20 000 mAh model from Anker usually does the trick for a two-day trek.
- Turn the phone to airplane mode, lower the screen brightness, and enable the app’s “offline only” setting.
Waterproof dry bags (think Best Power Banks for Hiking) keep the unit dry even if you’re caught in a downpour.
Using GPS as a redundancy layer
When you first set up camp, pop open OS Maps (paid link), find your current grid reference, and compare it to the spot you marked on the paper map. If they match, you’re good. If not, double-check your compass bearing – the GPS is there to catch a mistake, not to dictate the route.
What are the Most Common UK Navigation Mistakes?
The biggest navigation mistakes in the UK often stem from over-reliance on a single tool or ignoring the practical realities of the terrain. Fixating on your compass needle without observing the landscape, for example, is a common pitfall. It’s easy to get tunnel vision, but the map and compass are guides, not blindfolds.
- Fixating on the needle – Ignoring the terrain around you. If you’re walking uphill but the map shows a dip, you’ve probably mis-read the contour lines.
- Skipping the scale – Assuming a 1 km grid line equals a 1 km walk on the ground. On steep ground, you’ll cover less distance than you think.
- Wind drift – A strong gale can push you off course, especially on open moorland. Keep an eye on your bearing every few minutes.
- The grid-reference trap – Mixing up eastings and northings or dropping a digit. A six-figure reference like NY 123 456 becomes NY 12 345 6 if you misplace the numbers, sending you miles off track.
Red-flag checklist:
- If you’re climbing a hill and the map shows you should be descending – stop and re-orient.
- If the compass needle spins wildly, you might be near a magnetic anomaly; move to a different spot and re-take the bearing.
- If the GPS shows you’re 200 m off the plotted route, double-check the paper map first.
For more safety tips, see our Mountain Safety Tips.
Common Questions
Do I need a compass if I have a GPS?
Absolutely. GPS batteries die, and you can lose signal in deep valleys or dense forest. A compass is a cheap, reliable backup that never goes on the blink, making it an essential piece of kit for UK wild camping.
What is the difference between 1:25k and 1:50k maps?
The 1:25 000 Explorer series shows every footpath, wall, and minor feature – perfect for detailed navigation and precise wild camping. The 1:50 000 Landranger series gives a broader overview but omits smaller tracks, making it less useful for pinpoint route-finding.
How do I set up my GPS for offline use?
Before you head out, download the relevant OS Explorer sheet for your area, ensure your phone is fully charged, and always carry a power bank. Once in the wild, turn your device to airplane mode and enable the app’s low-power setting to preserve battery life.
What is the “Red on Red” rule?
The “Red on Red” rule means aligning the red compass needle with the red grid lines on your map, ensuring your map’s north arrow points to magnetic north. This simple method provides a quick, visual confirmation that you’re oriented correctly and on the right track.
Is magnetic declination important for UK hiking?
For everyday navigation and shorter hikes, the “Red on Red” method is generally sufficient. However, for precise surveying or long-distance trekking across complex terrain like the Cairngorms, you’ll want to apply the local declination value (typically a few degrees east) to your bearing for accuracy.
UK Navigation Map Scales
| Series | Scale | Detail Level | Best For |
|---|---|---|---|
| Explorer | 1:25,000 | High | Detailed routes, wild camping |
| Landranger | 1:50,000 | Medium | Broad overview, planning |
| OS Maps App | Digital | Variable | Confirmation layer, offline use |

Ready to Start?
You’ve now got the basics of a resilient navigation system: read the orange grid, set a bearing, and use GPS as a safety net. The real mastery comes from practice – pop out for a short walk, test the “Red on Red” rule, and watch how quickly confidence builds. You can find more practical tips and stories on our blog.
The next logical step? Make sure your kit is up to scratch. Our Wild Camping Navigation Checklist walks you through every essential – map, compass, power bank, and the little extras you might overlook.
You now have the full picture – Download the Free Checklist.
Happy trekking, and remember: the UK wilderness is beautiful, but it rewards those who come prepared. Keep the map in your pack, the compass in your pocket, and the confidence in your stride.
Related Guides
For a complete overview, see our Mastering Wilderness Skills & Safety for UK Backpackers.
References
- Ordnance Survey - Official UK mapping agency
- Mountain Rescue England & Wales - Emergency rescue guidelines
- Cicerone Publishing - Outdoor walking guides
Products linked above are ones we recommend based on owner feedback and UK-condition testing reports.
Map data and footpath routes are updated regularly. Carry the latest OS Explorer map for your area.